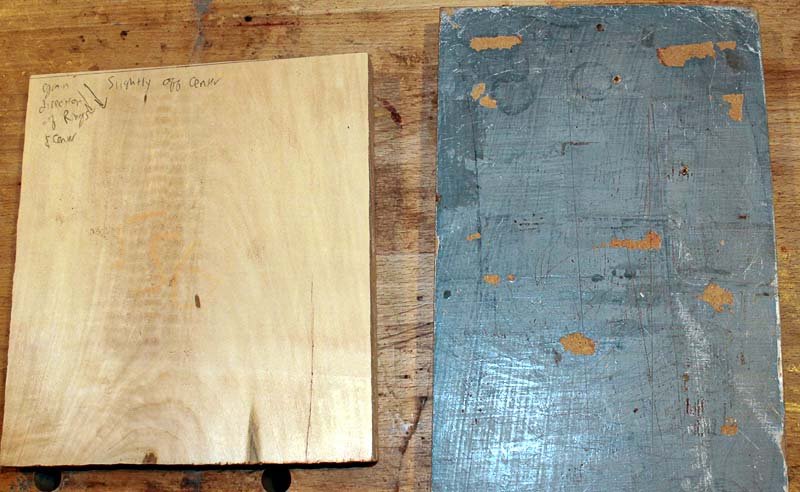
Router Based Wood Inlays

Material Preparation

Click twice to play

Prepare the Inlay Material

  Use double sided tape to affix the inlay material to a sacrificial material such as MDF.

  The main reason for doing this is because nothing but the router moves during the cutting process. If the inlay material moves during the cutting process chances are the inlay will be ruined and you'll have to cut another piece.

  When you cut out the inlay you're going to scar up whatever is beneath the inlay material. It's better to cut up some sort of sacrificial material than a work bench!

Needs Cleaning Up
Backing material needs sanding

Cleaned Up
Backing material sanded

Prepare the Backing Material

  You can use all sorts of different materials for your sacrificial material. I've used plywood, hardwood, but my favorite is MDF. The reason I like MDF is because you don't get splinters as you cut through it and it never warps. It's also pretty easy to clean up!

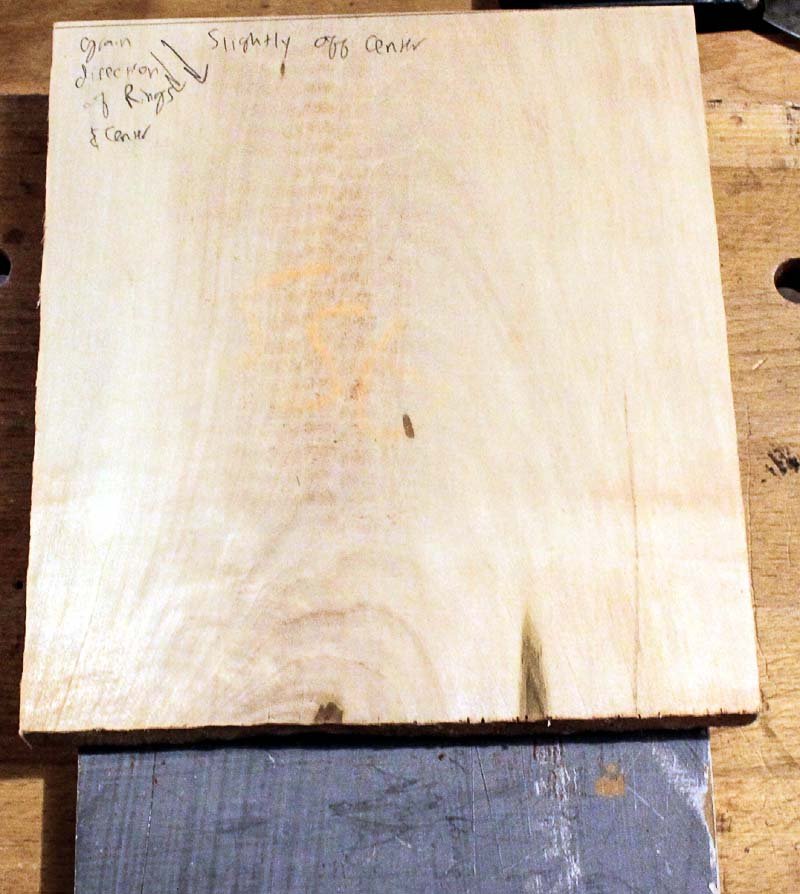
  The backing material doesn't need to be completely devoid of marks, it just needs to relatively free of debris and flat. If you look at the two pictures showing backing material you'll see that the top photo has all sorts of gunk on it. Because of all the gunk you may or may not get good adhesion between the backing material and the inlay material.

  The easiest way to prepare your inlay material is to first take a paint scraper to the material and scrap off as much gunk as you can. After the gunk is removed take a sander to the material to help flatten down any ridges on the board and to finish cleaning it up. The board doesn't need to be perfect, it just needs to be clean and flat enough so you get good adhesion between the inlay material and the sacrificial material.

Material Taped
Backing material needs sanding

Material Cut
Backing material sanded

Prepare the Inlay Material

  Prior to applying the tape to the inlay material mark out where you want to cut your inlay from. Make sure the "interesting" side is facing up when marking the outline of the shape to be cut out. Then place the tape on the BACK side of the inlay material.

  The main thing you want to do when preparing the inlay material is to apply double sided tape directly below those areas where you'll be cutting out the inlay. You don't need to apply tape to the whole board if you're not cutting up the whole board.

  Make sure you use enough tape so the inlay piece doesn't move during the cutting process. It's also a good idea to use enough tape so the entire board doesn't move during the cutting process.

Base Material
Backing material needs sanding

>
Material Taped
Backing material sanded
Material Affixed
Backing material sanded

Prepare the Base Material

  The Base material is defined as the material you'll be building your inlay into.

  The only time you need to affix the Base Material to a backing board is if the material isn't large enough to easily clamp to a workbench without clamps getting in the way of the router during the cutting process.

  In the pictures you can see an example of the Base Material being to small to effectively clamp to the work bench. So what I did was attach it to a backing board. The I clamp the backing board to the workbench giving me plenty of clearance between the clamps and the base of the router when routing out voids.

Peel Backing
Backing material needs sanding
Pic
Backing material sanded

Peel Tape Backing Off

  After you stick the double sided tape to the inlay material you'll need to peel the vinyl backing off to expose the other side of the tape.

  You can just use your fingernail to scrape at the backing until you get an edge. After you see / feel the edge grab it and pull it off.

  I used the fingernail method for awhile until one day my fingernail split down the middle which was a little like getting a bee sting underneath my fingernail. Not being a fan of pain I decided to look for a better method. The best way, that I've found, is to find a pic like the one pictured. Use the sharp point of the pick to grab at the vinyl and then pull it off. It's much easier and a whole lot less painful!

Facebook link   Pinterest link   etsy link