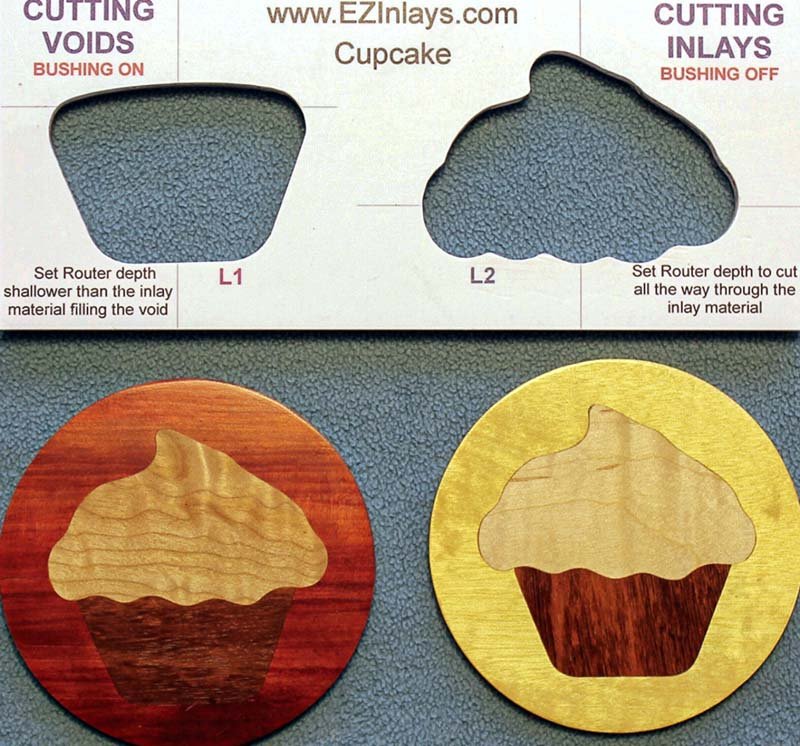
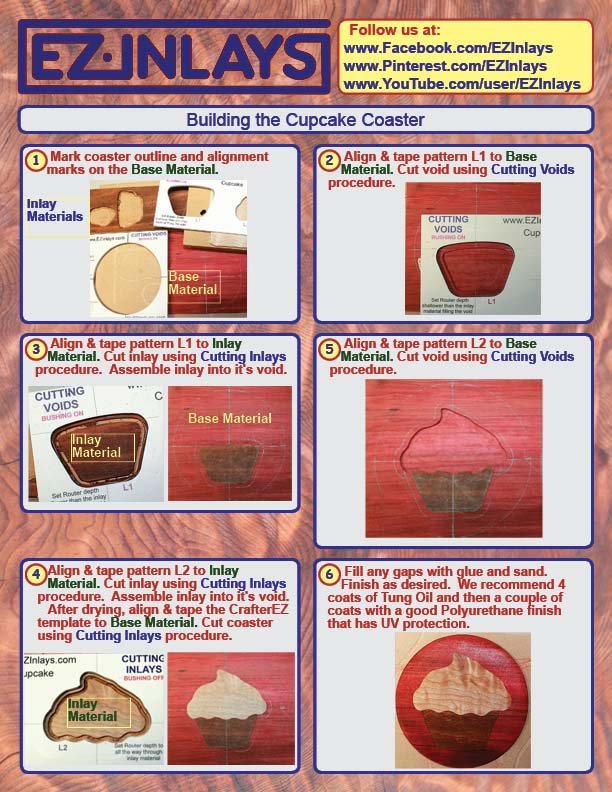
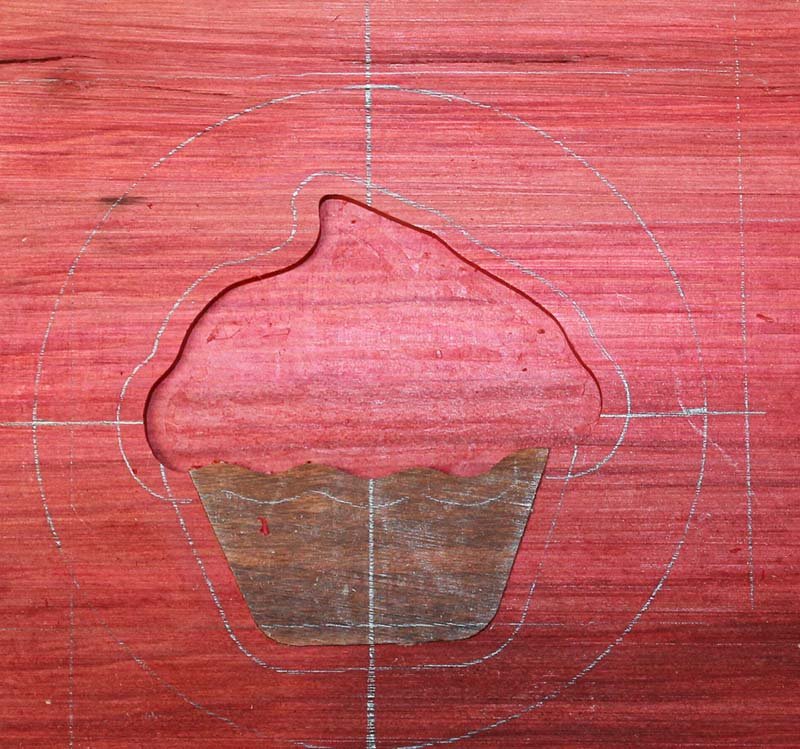
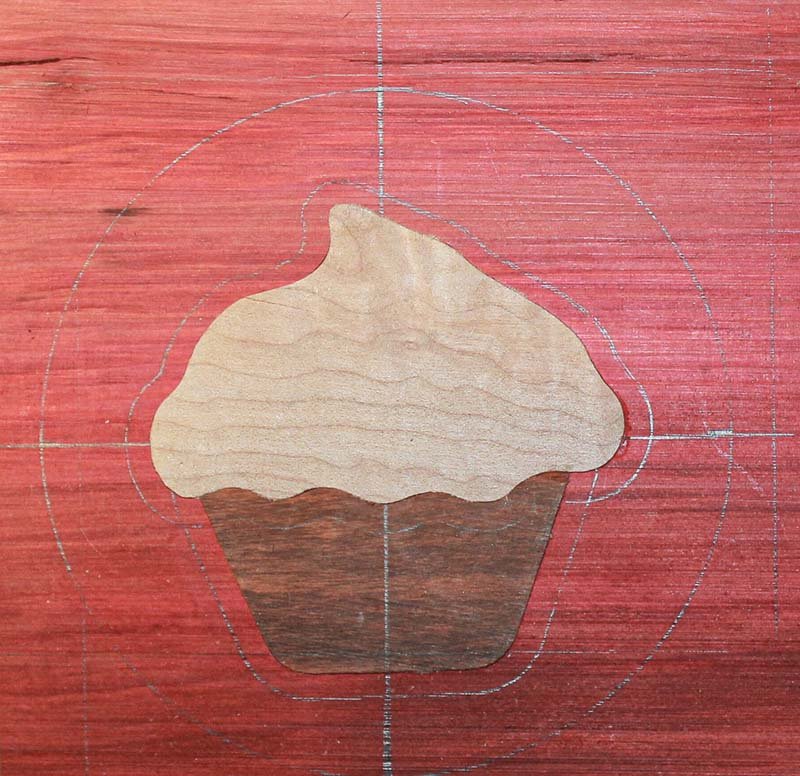
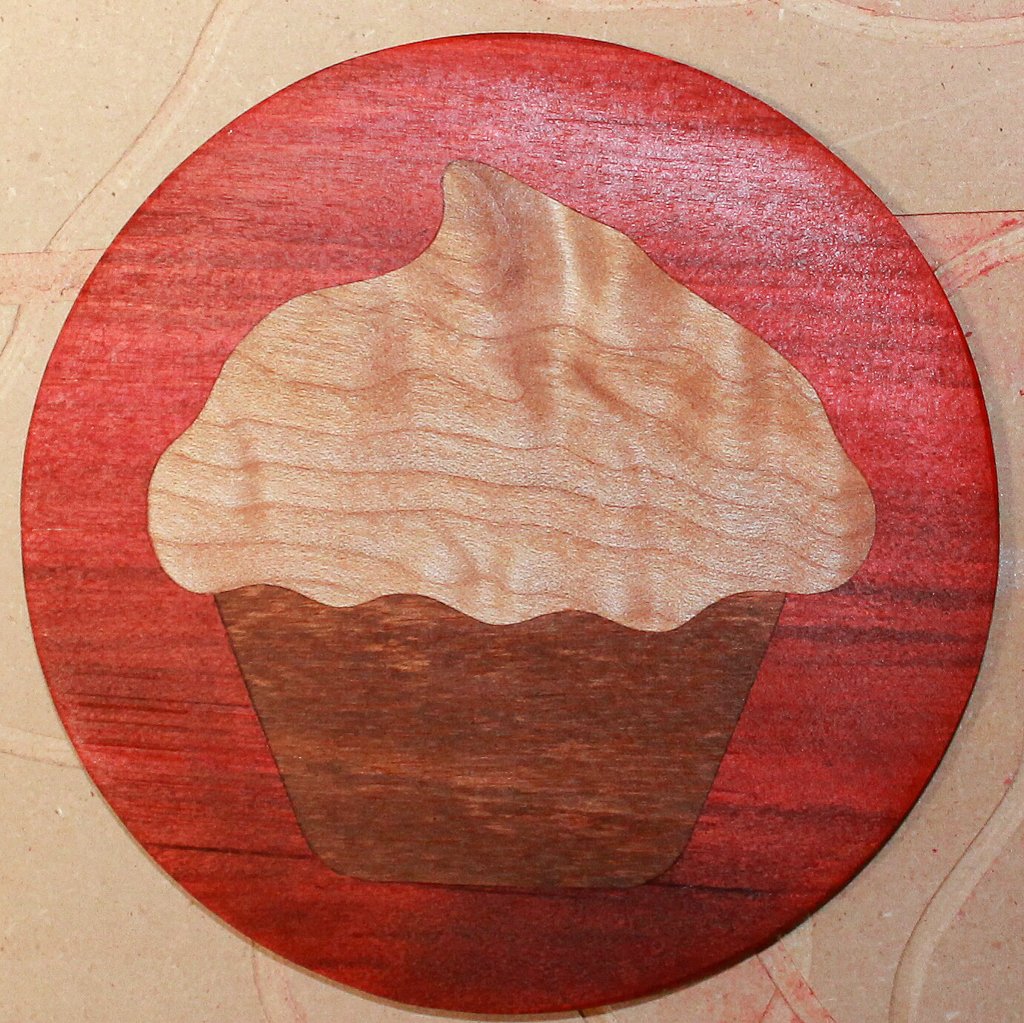
For $15 you'll receive the Cupcake inlay template that can be used to add a cupcake to your project or be placed in the center of a coaster. When building a coaster the Cupcake template is used with the Crafters kit. If you already have a Crafters kit great! If not it can be purchased for $25.
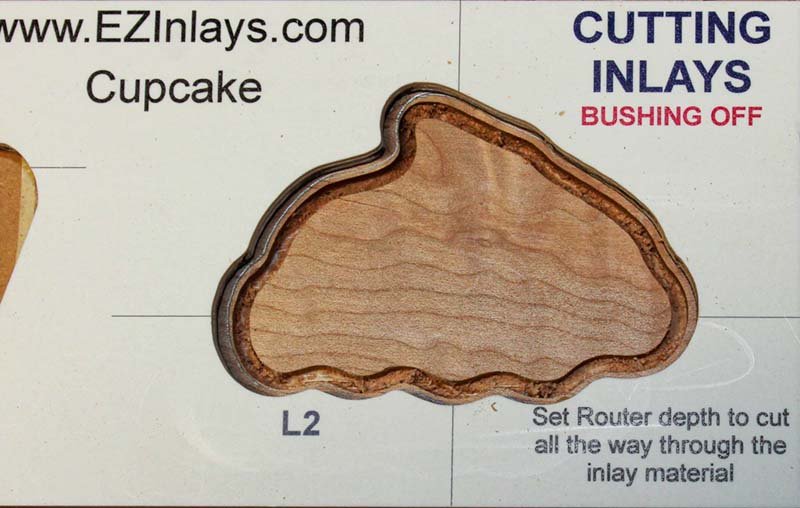
It takes about an hour to build the Cupcake inlay, even less if you're inlaying it into something other than coaster.
This is one of the simplest inlays you'll ever build. Be warned though, there's a real chance you might want a snack after building this inlay! :O
To build this inlay all you need is some wood and a few basic tools. Click here review the Router Based Inlay Tool List.
Never built an inlay before? Click here to Learn How To Build Any Wood Inlay.
Click twice to play
To build the Cupcake Coaster you're going to need three different spices of wood, two for the inlay and the base material. The build in the video uses a figured Walnut as the base material, curly Maple for the frosting, and Canary wood as the cupcake. The instructions below used Redheart for the base material, Goncalo Alves as the cupcake, and curly Maple for the frosting.
If building a coaster the base material, or the coaster itself, should be at least 5" X 5" by 3/8" thick. For the cake part of the inlay you need a piece of wood that's at least 3" X 3" X 1/8" thick. For the frosting the minimum dimensions are 4" X 3" X 1/8" thick.
Click twice to play
You need to create alignment marks so you know where to place the templates when building the cupcake. All you're really doing is putting big plus symbol on the base material.
Use the alignment marks to position the L1 shape on the base material. Trace the shape of the cupcake and the template to assist you with applying double sided tape.
Apply double sided tape to the base material, peel the backing off the tape, align the template, and firmly press it into place.
Need an alignment mark refresher? Click here to review how to create and use alignment marks.
Click twice to play
Using the registration marks, not the template outline, position and secure the L1 opening to the base material.
Set up your router to route the L1 shape void into the base material.
Always route voids using two passes. The first pass removes the majority of the material while the second pass is used to ensure the void has sharp edges for the inlay to fit into. Click here to review how to Cut Voids.
After the void has been routed use a paint scraper to gently pry the template off the inlay material. Use a little care as the templates are somewhat pliable but will snap if bent to far.
Click twice to play
Select the material for the L1 inlay. Find an area, with a grain direction and pattern that's pleasing to you, and trace the shape. Apply double sided tape, and firmly press the template into place.
Clamp the entire assembly to the workbench, so nothing but the router moves during the cutting process, and route out the inlay.
If necessary, click here review how to Cut Inlays.
After the inlay has been cut use a paint scraper to carefully remove the template and inlay material away from the backing board.
Click twice to play
Check to see how well the L1 inlay fits into the void. Don't be surprised if there's some debris on the bottom of the inlay that needs to be removed to ensure a proper fit.
If you sand put a slight bevel on the bottom edge of the inlay to help fit the inlay into the void. DO NOT sand on the top of the inlay as that will create gaps in your inlay. When fitting the inlay into it's void DO NOT press it to far into place or else it will be a bear to get back out!!!
Smear glue in the void and on the inlay piece itself. Place the inlay into it's void and I like to use a soft mallet to tap in into place until it's fully seated.
If needed, click here review how to Assemble the Inlay.
Because you need to let the glue holding the L1 inlay in place, now is a good time to cut out the L2 inlay.
For this inlay select some wood that has character. Just as an FYI, figured woods just make the best frosting!
Take the template and slide the L2 cutout around the wood until you find something that looks good . Personally I prefer a horizontal grain pattern, but that is your choice!
After the L2 inlay has been routed it should look something like this picture.
This layer cuts the void for the frosting in the base material.
Using the registration marks, not the template outline, position and secure the L2 opening to the base material.
Route the void for the frosting using the Cutting a Void procedure
After the void has been routed, use the paint scraper to pry the template off the base material. Your project should now look something like the picture.
Once the L2 inlay is removed from the backing material do a quick check to see how well it fits into the void. If needed sand the inlay to get a proper fit.
After the inlay has been fitted smear some glue in the void and on the inlay piece itself. Place the inlay into it's void and tap in into place until fully seated.
After assembling the L2 inlay it should look something like this picture.
To cut out the Coaster position the Crafters template, using the alignment marks, and affix it to the workpiece using double sided tape..
Because the coaster material is 3/8" thick it's best to cut out the coaster using multiple passes. For the first pass don't plunge the router to it's fullest depth, instead just plunge it about half way down.
Make one complete pass around the shape, turn off the router, un-plunge it, and vacuum away the debris from the cutting process. Then make another pass this time plunging the router to it's fullest depth.
After the inlay has been routed, use the paint scraper to remove the template but leave the coaster attached to the backing material. It's easier to do the gap filling sanding while the coaster is still held to the backing material, even though I didn't do that in the video. :(
Click twice to play
Usually there are a few small gaps that need to be fixed. Just smear a little glue into the gaps, wipe off the excess glue, and then sand to mix sawdust with the glue. This will blur the gaps making them disappear.
Use a paint scraper and remove the coaster from the backing material. Sand the edges and the back of the coaster. Softening the edges by lightly sanding them using 220 or finer grit sandpaper.
Apply the finish of your choice. Personally I like to rub in a coat of Tung Oil, let it dry, apply another coat, let it dry, and then apply a third coat. After the Tung Oil has completely dried, a couple of days is best, apply a polyurethane coating with UV protection to the coaster. The poly will help protect your coaster from marking and the UV coating will help preserve the color of the wood over time.