 $20
$20FREE SHIPPING
We only ship in the US
Ice Cream Cone:
4" tall, 3" wide
Add the Crafters Template
$25
FREE SHIPPING
FREE SHIPPING
Coaster Dimensions:
4-1/4" diameter


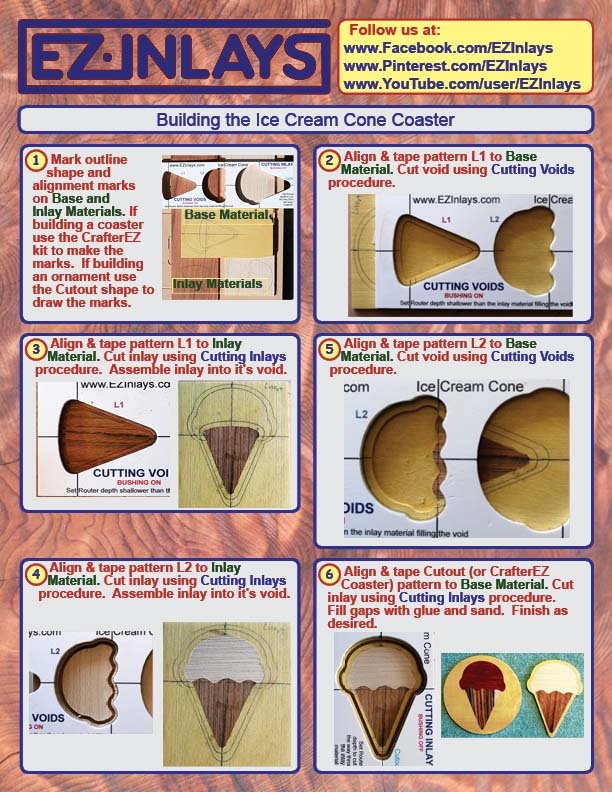
What's Included in the Kit
For $20 you'll receive the Ice Cream Cone inlay template that can be used to add a ice cream cone to your project, cut out as an ornament, or be placed in the center of a coaster. When building a coaster the Ice
Cream Cone template is used in conjunction with the Crafters kit.